Macでpython3の環境構築3---ライブラリのインストール---
今回の投稿はそれほど手順は多くないのですが、この次の記事がいろいろ複雑なので、忘れないうちに、さっさとこの記事は作ってしまおう。
前回、前々回でHomebrewをイントールし、python3をインストールしました。
そこまでできてしまえば、今回はすぐ終わります。
今回はNumpyとNetworkxとscikit-learnのインストール方法を紹介します。
Numpyのインストール
順不同ですが、まずはNumpyから。
ターミナルを開き、カーソルが点滅しているところに次のようなコマンドを打つだけです。
hiroshi-no-MacBook-Air:~ hiroshi$ pip3 install numpy # 「pip3 install numpy」というコマンドを打ち、returnを押す。
そうすると、以下のような処理が始まります。
You are using pip version 7.1.0, however version 7.1.1 is available.

You should consider upgrading via the 'pip install --upgrade pip' command.

Collecting numpy

  Downloading numpy-1.9.2-cp34-cp34m-macosx_10_6_intel.macosx_10_9_intel.macosx_10_9_x86_64.macosx_10_10_intel.macosx_10_10_x86_64.whl (3.7MB)

    100% |████████████████████████████████| 3.7MB 91kB/s

Installing collected packages: numpy

Successfully installed numpy-1.9.2

hiroshi-no-MacBook-Air:~ hiroshi$
Successfully installed numpy-1.9.2
と出ているので、無事インストール完了です。
Networkxのインストール
同様に、
hiroshi-no-MacBook-Air:~ hiroshi$ pip3 install networkx # 「pip3 install networkx」というコマンドを打ち、returnを押す。
と打つと、
You are using pip version 7.1.0, however version 7.1.1 is available.

You should consider upgrading via the 'pip install --upgrade pip' command.

Collecting networkx

  Downloading networkx-1.10.tar.gz (1.2MB)

    100% |████████████████████████████████| 1.2MB 316kB/s

Collecting decorator>=3.4.0 (from networkx)

  Downloading decorator-4.0.2-py2.py3-none-any.whl

Building wheels for collected packages: networkx

  Running setup.py bdist_wheel for networkx

  Stored in directory: /Users/hiroshi/Library/Caches/pip/wheels/5d/de/da/01c04502599d67f0b7830214036cd909f211240dbeb23a796c

Successfully built networkx

Installing collected packages: decorator, networkx

Successfully installed decorator-4.0.2 networkx-1.10

hiroshi-no-MacBook-Air:~ hiroshi$
となります。
scikit-learnのインストール
また同様に、
hiroshi-no-MacBook-Air:~ hiroshi$ pip3 install scikit-learn # 「pip3 install scikit-learn」というコマンドを打ち、returnを押す。
とすれば、
You are using pip version 7.1.0, however version 7.1.1 is available.

You should consider upgrading via the 'pip install --upgrade pip' command.

Collecting scikit-learn

  Downloading scikit_learn-0.16.1-cp34-cp34m-macosx_10_6_intel.macosx_10_9_intel.macosx_10_9_x86_64.macosx_10_10_intel.macosx_10_10_x86_64.whl (5.1MB)

    100% |████████████████████████████████| 5.1MB 82kB/s

Installing collected packages: scikit-learn

Successfully installed scikit-learn-0.16.1

hiroshi-no-MacBook-Air:~ hiroshi$
となります。
Macでpython3の環境構築2---python3本体のインストール---
前回「MacでPython3の環境構築1---Homebrewのインストール---」ではHomebrewをインストールしたので、次にpython3をインストールします。
とは言っても、Homebrewさえインストールしてしまえば、あとはコマンドを一回打つだけなのですが。
ターミナルを開いて、カーソルが点滅しているところに以下のように打ちます。
hiroshi-no-MacBook-Air:~ hiroshi$ brew install python3 # 「brew install python3」というコマンドを打ち、returnを押す。
そうすると、以下のような処理が走りますので、完了するまで待つだけです。
==> Installing dependencies for python3: readline, sqlite, gdbm, openssl, xz

==> Installing python3 dependency: readline

==> Downloading https://homebrew.bintray.com/bottles/readline-6.3.8.yosemite.bottle.tar.gz

######################################################################## 100.0%

==> Pouring readline-6.3.8.yosemite.bottle.tar.gz

==> Caveats

This formula is keg-only, which means it was not symlinked into /usr/local.


OS X provides the BSD libedit library, which shadows libreadline.

In order to prevent conflicts when programs look for libreadline we are

defaulting this GNU Readline installation to keg-only.


Generally there are no consequences of this for you. If you build your

own software and it requires this formula, you'll need to add to your

build variables:


    LDFLAGS:  -L/usr/local/opt/readline/lib

    CPPFLAGS: -I/usr/local/opt/readline/include


==> Summary

🍺  /usr/local/Cellar/readline/6.3.8: 40 files, 2.1M

==> Installing python3 dependency: sqlite

==> Downloading https://homebrew.bintray.com/bottles/sqlite-3.8.11.1.yosemite.bottle.tar.gz

######################################################################## 100.0%

==> Pouring sqlite-3.8.11.1.yosemite.bottle.tar.gz

==> Caveats

This formula is keg-only, which means it was not symlinked into /usr/local.


OS X provides an older sqlite3.


Generally there are no consequences of this for you. If you build your

own software and it requires this formula, you'll need to add to your

build variables:


    LDFLAGS:  -L/usr/local/opt/sqlite/lib

    CPPFLAGS: -I/usr/local/opt/sqlite/include


==> Summary

🍺  /usr/local/Cellar/sqlite/3.8.11.1: 9 files, 2.8M

==> Installing python3 dependency: gdbm

==> Downloading https://homebrew.bintray.com/bottles/gdbm-1.11.yosemite.bottle.2.tar.gz

######################################################################## 100.0%

==> Pouring gdbm-1.11.yosemite.bottle.2.tar.gz

🍺  /usr/local/Cellar/gdbm/1.11: 17 files, 532K

==> Installing python3 dependency: openssl

==> Downloading https://homebrew.bintray.com/bottles/openssl-1.0.2d_1.yosemite.bottle.tar.gz

######################################################################## 100.0%

==> Pouring openssl-1.0.2d_1.yosemite.bottle.tar.gz

==> Caveats

A CA file has been bootstrapped using certificates from the system

keychain. To add additional certificates, place .pem files in

  /usr/local/etc/openssl/certs


and run

  /usr/local/opt/openssl/bin/c_rehash


This formula is keg-only, which means it was not symlinked into /usr/local.


Apple has deprecated use of OpenSSL in favor of its own TLS and crypto libraries


Generally there are no consequences of this for you. If you build your

own software and it requires this formula, you'll need to add to your

build variables:


    LDFLAGS:  -L/usr/local/opt/openssl/lib

    CPPFLAGS: -I/usr/local/opt/openssl/include


==> Summary

🍺  /usr/local/Cellar/openssl/1.0.2d_1: 464 files, 18M

==> Installing python3 dependency: xz

==> Downloading https://homebrew.bintray.com/bottles/xz-5.2.1.yosemite.bottle.tar.gz

######################################################################## 100.0%

==> Pouring xz-5.2.1.yosemite.bottle.tar.gz

🍺  /usr/local/Cellar/xz/5.2.1: 59 files, 1.7M

==> Installing python3

==> Downloading https://homebrew.bintray.com/bottles/python3-3.4.3_2.yosemite.bottle.1.tar.gz

######################################################################## 100.0%

==> Pouring python3-3.4.3_2.yosemite.bottle.1.tar.gz

==> /usr/local/Cellar/python3/3.4.3_2/bin/python3 -s setup.py --no-user-cfg install --force --verbose --install-scripts=/us

==> /usr/local/Cellar/python3/3.4.3_2/bin/python3 -s setup.py --no-user-cfg install --force --verbose --install-scripts=/us

==> /usr/local/Cellar/python3/3.4.3_2/bin/python3 -s setup.py --no-user-cfg install --force --verbose --install-scripts=/us

==> Caveats

Pip and setuptools have been installed. To update them

  pip3 install --upgrade pip setuptools


You can install Python packages with

  pip3 install


They will install into the site-package directory

  /usr/local/lib/python3.4/site-packages


See: https://github.com/Homebrew/homebrew/blob/master/share/doc/homebrew/Homebrew-and-Python.md


.app bundles were installed.

Run `brew linkapps python3` to symlink these to /Applications.

==> Summary

🍺  /usr/local/Cellar/python3/3.4.3_2: 4696 files, 79M

hiroshi-no-MacBook-Air:~ hiroshi$
完了したら、念のため確認として、次のよう打つと、すでにインストールされているよ、とメッセージが出てきます。
hiroshi-no-MacBook-Air:~ hiroshi$ brew install python3
Warning: python3-3.4.3_2 already installed
以上で、とりあえずpython3本体のインストールは完了です。
例によって、また上で出てきた処理のプロセスの全文を最後にまとめておきます。
hiroshi-no-MacBook-Air:~ hiroshi$ brew install python3

==> Installing dependencies for python3: readline, sqlite, gdbm, openssl, xz

==> Installing python3 dependency: readline

==> Downloading https://homebrew.bintray.com/bottles/readline-6.3.8.yosemite.bottle.tar.gz

######################################################################## 100.0%

==> Pouring readline-6.3.8.yosemite.bottle.tar.gz

==> Caveats

This formula is keg-only, which means it was not symlinked into /usr/local.


OS X provides the BSD libedit library, which shadows libreadline.

In order to prevent conflicts when programs look for libreadline we are

defaulting this GNU Readline installation to keg-only.


Generally there are no consequences of this for you. If you build your

own software and it requires this formula, you'll need to add to your

build variables:


    LDFLAGS:  -L/usr/local/opt/readline/lib

    CPPFLAGS: -I/usr/local/opt/readline/include


==> Summary

🍺  /usr/local/Cellar/readline/6.3.8: 40 files, 2.1M

==> Installing python3 dependency: sqlite

==> Downloading https://homebrew.bintray.com/bottles/sqlite-3.8.11.1.yosemite.bottle.tar.gz

######################################################################## 100.0%

==> Pouring sqlite-3.8.11.1.yosemite.bottle.tar.gz

==> Caveats

This formula is keg-only, which means it was not symlinked into /usr/local.


OS X provides an older sqlite3.


Generally there are no consequences of this for you. If you build your

own software and it requires this formula, you'll need to add to your

build variables:


    LDFLAGS:  -L/usr/local/opt/sqlite/lib

    CPPFLAGS: -I/usr/local/opt/sqlite/include


==> Summary

🍺  /usr/local/Cellar/sqlite/3.8.11.1: 9 files, 2.8M

==> Installing python3 dependency: gdbm

==> Downloading https://homebrew.bintray.com/bottles/gdbm-1.11.yosemite.bottle.2.tar.gz

######################################################################## 100.0%

==> Pouring gdbm-1.11.yosemite.bottle.2.tar.gz

🍺  /usr/local/Cellar/gdbm/1.11: 17 files, 532K

==> Installing python3 dependency: openssl

==> Downloading https://homebrew.bintray.com/bottles/openssl-1.0.2d_1.yosemite.bottle.tar.gz

######################################################################## 100.0%

==> Pouring openssl-1.0.2d_1.yosemite.bottle.tar.gz

==> Caveats

A CA file has been bootstrapped using certificates from the system

keychain. To add additional certificates, place .pem files in

  /usr/local/etc/openssl/certs


and run

  /usr/local/opt/openssl/bin/c_rehash


This formula is keg-only, which means it was not symlinked into /usr/local.


Apple has deprecated use of OpenSSL in favor of its own TLS and crypto libraries


Generally there are no consequences of this for you. If you build your

own software and it requires this formula, you'll need to add to your

build variables:


    LDFLAGS:  -L/usr/local/opt/openssl/lib

    CPPFLAGS: -I/usr/local/opt/openssl/include


==> Summary

🍺  /usr/local/Cellar/openssl/1.0.2d_1: 464 files, 18M

==> Installing python3 dependency: xz

==> Downloading https://homebrew.bintray.com/bottles/xz-5.2.1.yosemite.bottle.tar.gz

######################################################################## 100.0%

==> Pouring xz-5.2.1.yosemite.bottle.tar.gz

🍺  /usr/local/Cellar/xz/5.2.1: 59 files, 1.7M

==> Installing python3

==> Downloading https://homebrew.bintray.com/bottles/python3-3.4.3_2.yosemite.bottle.1.tar.gz

######################################################################## 100.0%

==> Pouring python3-3.4.3_2.yosemite.bottle.1.tar.gz

==> /usr/local/Cellar/python3/3.4.3_2/bin/python3 -s setup.py --no-user-cfg install --force --verbose --install-scripts=/us

==> /usr/local/Cellar/python3/3.4.3_2/bin/python3 -s setup.py --no-user-cfg install --force --verbose --install-scripts=/us

==> /usr/local/Cellar/python3/3.4.3_2/bin/python3 -s setup.py --no-user-cfg install --force --verbose --install-scripts=/us

==> Caveats

Pip and setuptools have been installed. To update them

  pip3 install --upgrade pip setuptools


You can install Python packages with

  pip3 install


They will install into the site-package directory

  /usr/local/lib/python3.4/site-packages


See: https://github.com/Homebrew/homebrew/blob/master/share/doc/homebrew/Homebrew-and-Python.md


.app bundles were installed.

Run `brew linkapps python3` to symlink these to /Applications.

==> Summary

🍺  /usr/local/Cellar/python3/3.4.3_2: 4696 files, 79M

hiroshi-no-MacBook-Air:~ hiroshi$ brew install python3
Warning: python3-3.4.3_2 already installed
Macでpython3の環境構築1---Homebrewのインストール---
これから数回はMac上にpythonの環境構築をする過程を紹介しようと思います。
インストールするのはpython3です。
で、いろいろ調べてみると、pythonをインストールする下準備としてHomebrewというものをまずインストールしたほうがよいらしい。
Homebrewというものがいまいちなんなのかよくわかっていないし、pipやeasyinstallなんてものもあるようで、それらとの関係性もいまいち理解しきれていませんが、とりあえずインストールしてみます。
このあたりの説明が丁寧にされていう情報源があれば、どなたかご紹介願います。
まずはHomebrewのホームページへ行き、トップページに記載されているコマンドをコピーします。
それを、ターミナルのカーソルが点滅しているところにそのまま貼り付けをしreturnを押します。
そうすると、次のような処理が走ります。
Last login: Thu Aug 20 23:14:03 on ttys000

hiroshi-no-MacBook-Air:~ hiroshi$ ruby -e "$(curl -fsSL https://raw.githubusercontent.com/Homebrew/install/master/install)"   #←これが貼り付けたコマンド、ここでreturnを押す

==> This script will install:

/usr/local/bin/brew

/usr/local/Library/...

/usr/local/share/man/man1/brew.1


Press RETURN to continue or any other key to abort
一番最後に
Press RETURN to continue or any other key to abort
と求められていますが、ここは指示通りreturnを押します。
すると続きが進み
WARNING: Improper use of the sudo command could lead to data loss

or the deletion of important system files. Please double-check your

typing when using sudo. Type "man sudo" for more information.


To proceed, enter your password, or type Ctrl-C to abort.


Password:   #PWを入力しても、入力されているようには見えないが、きちんとPCには認識されている。
パスワードを求められます。これはPCにログインするときのパスワードを入力します。入力しても文字が入力されていないように見えますが、きちんとPCには認識されています。気にせずキーを叩きreturnを押せば先へ進みます。
returnを押すと処理が進み次のようになります。
==> /usr/bin/sudo /bin/chmod g+rwx /usr/local

==> /usr/bin/sudo /usr/bin/chgrp admin /usr/local

==> /usr/bin/sudo /bin/mkdir /Library/Caches/Homebrew

==> /usr/bin/sudo /bin/chmod g+rwx /Library/Caches/Homebrew

==> Downloading and installing Homebrew...

remote: Counting objects: 3707, done.

remote: Compressing objects: 100% (3542/3542), done.

remote: Total 3707 (delta 36), reused 511 (delta 26), pack-reused 0

Receiving objects: 100% (3707/3707), 3.06 MiB | 418.00 KiB/s, done.

Resolving deltas: 100% (36/36), done.

From https://github.com/Homebrew/homebrew

 * [new branch]      master     -> origin/master

HEAD is now at b63e755 update: only update renamed when necessary

==> Installation successful!

==> Next steps

Run `brew help` to get started

hiroshi-no-MacBook-Air:~ hiroshi$
一番下の行は、処理がひとまず終わり、次のコマンドの入力待ち、最初の状態。
で、次のようなことも念のためにやっておくと安心かも。確認作業ですが。
コマンドの入力待ちのところの続きで、カーソルが点滅しているところに、次のように入力します。
hiroshi-no-MacBook-Air:~ hiroshi$ brew doctor #brew doctorを入力する。
そうすると、正しくインストールできていれば、
Your system is ready to brew.
と返されます。
最新 バージョンではない可能性もあるので、次のようなコマンドも打っておきます。
hiroshi-no-MacBook-Air:~ hiroshi$ brew update
そうすると、今回は最新バージョンだったようなので、
Already up-to-date.
と返ってきます。
このあとにpythonのインストールをするわけですが、それは次回にします。
ここまでの画面の流れを最後にまとめておきます。
hiroshi-no-MacBook-Air:~ hiroshi$ ruby -e "$(curl -fsSL https://raw.githubusercontent.com/Homebrew/install/master/install)"

==> This script will install:

/usr/local/bin/brew

/usr/local/Library/...

/usr/local/share/man/man1/brew.1


Press RETURN to continue or any other key to abort

==> /usr/bin/sudo /bin/mkdir /usr/local


WARNING: Improper use of the sudo command could lead to data loss

or the deletion of important system files. Please double-check your

typing when using sudo. Type "man sudo" for more information.


To proceed, enter your password, or type Ctrl-C to abort.


Password:(コメント→PWを入力しても、入力されているようには見えないが入力されている)

==> /usr/bin/sudo /bin/chmod g+rwx /usr/local

==> /usr/bin/sudo /usr/bin/chgrp admin /usr/local

==> /usr/bin/sudo /bin/mkdir /Library/Caches/Homebrew

==> /usr/bin/sudo /bin/chmod g+rwx /Library/Caches/Homebrew

==> Downloading and installing Homebrew...

remote: Counting objects: 3707, done.

remote: Compressing objects: 100% (3542/3542), done.

remote: Total 3707 (delta 36), reused 511 (delta 26), pack-reused 0

Receiving objects: 100% (3707/3707), 3.06 MiB | 418.00 KiB/s, done.

Resolving deltas: 100% (36/36), done.

From https://github.com/Homebrew/homebrew

 * [new branch]      master     -> origin/master

HEAD is now at b63e755 update: only update renamed when necessary

==> Installation successful!

==> Next steps

Run `brew help` to get started

hiroshi-no-MacBook-Air:~ hiroshi$ brew doctor

Your system is ready to brew.

hiroshi-no-MacBook-Air:~ hiroshi$ brew update

Already up-to-date.
参考にしたページ
作業環境を整えるMacOSXのパッケージマネージャ「Homebrew」のインストール方法と使い方 | 株式会社LIG
Homebrewを使ってMacにPython3とかNumpyとかScipyとかをインストールする - 開発のヒホ
Macのツールを楽にインストールできるパッケージ管理システムHomebrewの使い方
MacでPythonの機械学習環境構築(2015年2月版) - old school magic
MacOSX - パッケージ管理システム Homebrew - Qiita
MacでC言語の環境構築
MacでC言語の開発環境を構築する方法はいくつかあるようですが、いろいろ調べてみてもXcode経由で構築するのが一番スムーズなようです。
ということで、Xcode経由でC言語の環境を作る方法を書いておこうと思います。
まず、Xcodeをインストールしましょう。
AppStoreを開き、右上の検索ボックスで「Xcode」と検索するといくつか検索結果が出てきます。
で、この画面では左上にXcodeがあるので、それをクリック。
「入手」をクリック。
「Appをインストール」をクリック。
そうするとappleIDのパスワードを求められますので入力。
そうするとダウンロードが始まります。
表示がインストール中に変わって、左下のLaunchpad(ロケットマーク)のところも進み始めます。
ここが長い。人にもよるでしょうが、ダウンロードだけで6時間くらいかかりました。
これはかかりすぎかしら。
僕は、夜にダウンロードを初めて、夜中はずっと放置しておきました。
ダウンロードが終わってLaunchpadをみてみると、ちゃんとダウンロードされております。
ここからXcodeを起動していくと、こんな画面が出てきます。
これは「Agree」を押して次へ進みます。
で「Install」を押します。
インストールが終わるとこうなります。
とりあえず、Xcodeのインストールは終わりましたが、続いてCのコンパイラgccのインストールをしていきます。
画面左上の「Xcode」をクリックし、「Open Developer Tool」にマウスを合わせ、さらに「More Developer Tool」をクリックします。
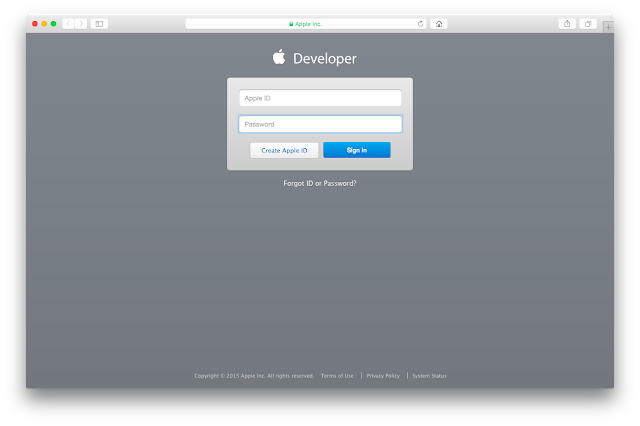
クリックするとブラウザが立ち上がり、AppleIDとパスワードを求められます。
入力して「Sigh in」を押します。
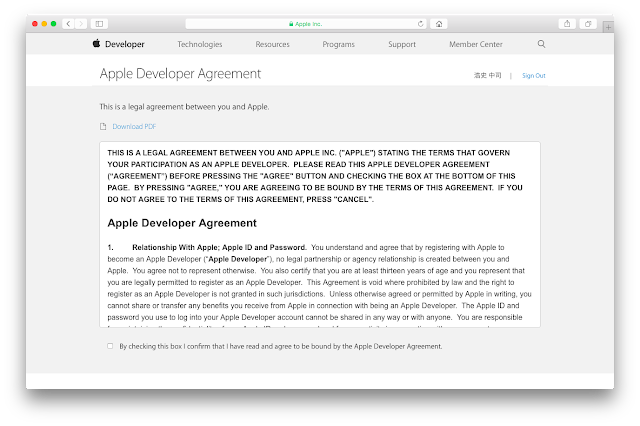
なにか同意書が出てくるので、左下のチェックボックスにチェックを入れます。
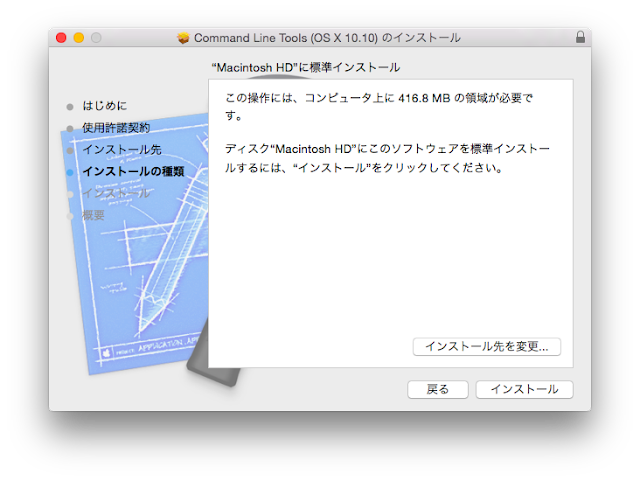
で、今回インストールするのは「 Command Line Tool 」です。
右の青い文字のところをクリックするとダウンロードが始まります。
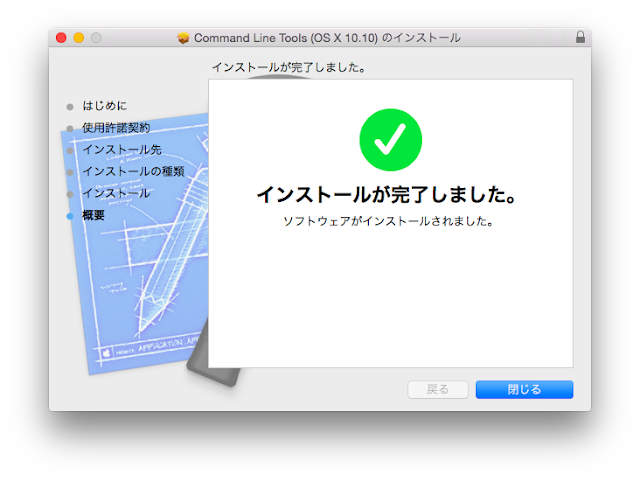
あとは順次画面に沿っていくだけです。
以上で完了です。お疲れ様でした。
このあと実際に、ソースコードを書いてコンパイルしてみるわけですが、それは次回にします。
参考にしたページ
「語り」を機械に置き換える
因果律
ウィルスバスター for Mac のインストール
今回はセキュリティソフトのインストール方法です。
インストールしたソフトはウィルスバスタークラウドです。PCを購入した時に同時購入したものです。
まあいざやってみれば、それほど難しくはないのですが、やっぱり書いてみる。
ソフトはCDROMだったので、それを外付けのドライブ(別売り)で入れます。
するとこんな画面が出てきます。
で、「ウィルスバスターfor Mac のインストール」をクリック。
で、クリックするとインストールするソフトウェアは信頼できるものですか、大丈夫ですか?というような確認画面が出てきますので、もちろんこれは「続ける」を選択します。
そうすると、インストール手順の画面が出てくるので、あとはほぼこれに従うだけ。
この画面は「続ける」をクリックします。
使用承諾書、いわゆり利用規約的な画面。気になる人は一応全部目を通して、希望であれば「端末環境情報とトレンドマイクロへ送信」のチェックを入れて、「続ける」をクリック。
問題なければ「同意する」をクリック。
次はシリアル番号の入力。
自分はCDROMからインストールしているのですが、CDが入っていたケースの中に、「インストール前の大事なお知らせ 大切に保管してください」という表面が赤の紙が入っていました。
表面の一番下にシリアル番号が記載されているので、それを入力します。ハイフンは自動で入力されます。
で、「インストール」をクリック。
そうするとPCのユーザー名とパスワードを求められます。
このPCの所有者から許可もらってますよね?ってことです。スクリーンショットを撮るときに、うっかりユーザー名とパスワード入りで撮ってしまったので、ここは画面なし。
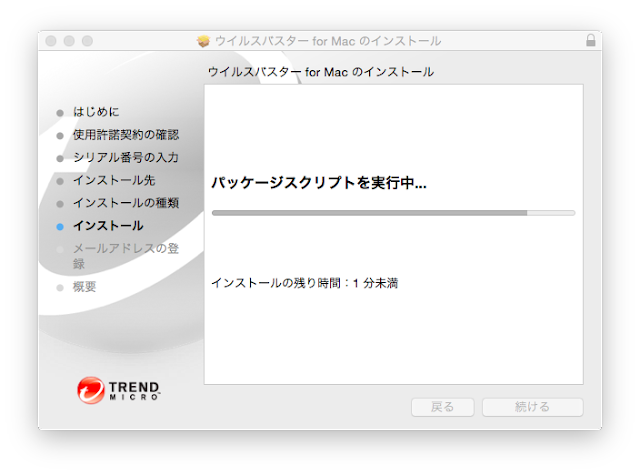
そうするとインストールが始まりますので少し待ちます。
で少し待つと、「インストールが完了しました」の画面が出てきます。
そうすると、いまはまだネットにつないでおらずアップデートをしていないのでこんなメッセージが出てきます。
今すぐアップデートを押すと当然こうなります。
ネットワークに(wifiに)接続すると、「アップデートを開始します」というようなメッセージが出てくるので、それをクリック。そうするとアップデートが始まります。
そうすると、保護機能を有効にするために登録をもとめられますので、連絡などがとれるメールアドレスを入力します。入力したら「次へ」ボタン。
それで、住所やなにやら、必要事項を入力して進んでいくと、最後にオンラインユーザー登録が完了しました、という画面が出てきます。
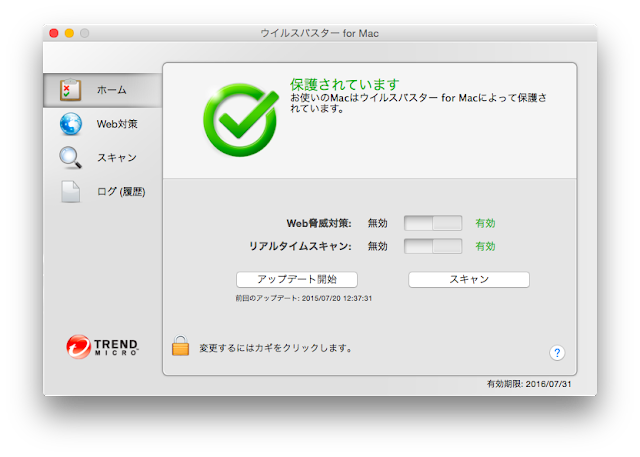
それで「閉じる」を押すと、こんな画面が出てきます。これで完了です。この画面は閉じてしまって問題ありません。
以上で完了です。お疲れ様でした。


